 |
| Be My Valentine |
 |
| From the Heart |
This Valentines I decided to make one for my daughter and one for her teacher. They were a lot of fun to make and turned out very nice.
Making these shirts is fairly inexpensive and a lot of fun. This could be a quick easy project for your children to do or a way to make a fun, personalized gift.
The items you will need are:
1 Tee Shirt (something with a 50/50 blend works best)
1 spray bottle
water
bleach
stencil
plastic bag
cardboard box
washing machine
paper towels
 First you will need to protect the surface area you intend to work on. To do these I used the middle of my kitchen floor. I placed a flattened card board box on the floor and laid my T-shirt across the box. I took a plastic trash bag and flattened it out and put it inside the T-shirt to keep the bleach from soaking through to the other side.
I then took my stencil and placed it on my T-shirt. This stencil is not what I would recommend for you to use on a regular basis but it was so cute I could not resist. I picked it up at Michael's and it is made out of balsa wood. It is a bit fragile and will not hold up to repeatedly bleaching very many times.

Next, I filled my spray bottle with 50% water and 50% bleach and tested the spray to insure that it was set for a fine spray mist. You can get several different looks on your T-shirt by incorporating different methods but I like graduating from a dark T-shirt at the bottom to a lighter bleached look at the top. Once I have the desired amount of bleach on my shirt I take a paper towel and remove the bleach on top of the stencil being careful not to blot the rest of the T-shirt. I then remove the stencil from the shirt so that I can watch the bleaching until it gets to the color I am happy with.
Once I am happy with the result I see, I carefully remove the plastic bag or the cardboard I have placed inside the shirt. I then take my shirt to the washing machine that I prefilled with laundry soap and hot water and dunk the shirt in a few times and then wash the shirt. I dry the shirt in the dryer as soon as it is through washing. The following times I wash the shirt I tend to let them line dry as to not weaken the material too much.


This is how the shirts looked after they had been run through the dryer.
Here are some other shirts I have done in the past.
 |
| Christmas Tree |
 |
| Reindeer on a Snowy Night |
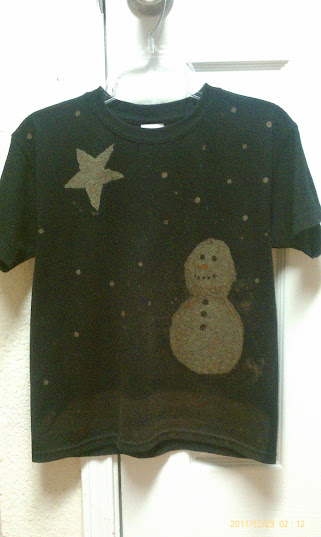 |
| Snow Man on a Snowy Night |
 |
| Too Much Hot Chocolate |
I will be adding some tips and tricks I have learned over the past week from a new Face Book friend named T.J. to make the process more efficient. This is T.J.'s Facebook page and he is actually selling the Tee's he makes.
As always feel free to post any questions or comments; I am always happy to share my ideas and how to do's.
Happy Crafting!
No comments:
Post a Comment